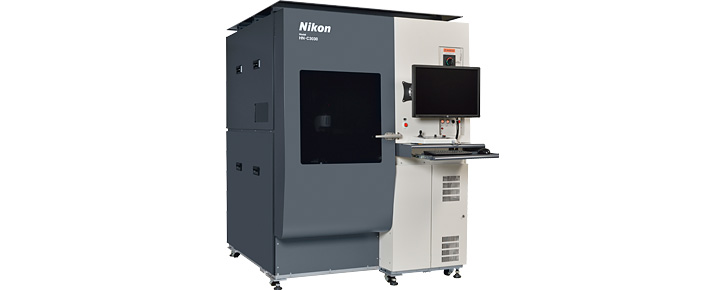
For high-speed, high-precision surface shape evaluation
The new high accuracy non-contact sensor 3D metrology system HN-C3030
October 23, 2014
TOKYO - Nikon Corporation (President: Kazuo Ushida) is pleased to announce the release of high accuracy non-contact sensor 3D metrology system HN-C3030, which realizes high-speed and high-precision non-contact 3D measurement.
This product will be displayed at the 27th JIMTOF (Japan International Machine Tool Fair, from October 30 to November 4, Tokyo).
Product information
| Product Name | High accuracy non-contact sensor 3D metrology system HN-C3030 |
|---|---|
| Available from | Early May, 2015 |

Product Concept
Along with the development of highly functionalized products and more complex components, demand for high-speed, precise measuring of complex structures has increased. Non-contact measuring systems using laser scanners can acquire high volume data much faster than touch probe type systems.
The new high accuracy non-contact sensor 3D metrology system HN-C3030 is a compact model that realizes high-speed, high-precision measurement. It enables data acquisition of a large number of measurement points and analysis of whole shapes, waviness, wear, deformity and minute convexoconcave surfaces.
Key Features
1. High-speed, high-precision measurement
High-speed digital transform processing enables surface point clouds to be acquired at the rate of 120,000 points per second. The HN-C3030 realizes high throughput-for example, inspection of all tooth surfaces on an approximately Φ250 mm automobile gear can be completed in only 5 minutes.
The HN-C3030 also provides high-precision measurement with the world’s lowest* ES,MPE of 5 µm for a non-contact system.
- *As of Oct. 23, 2014; based on research by Nikon on non-contact 3D measurement systems available at the time.
2. High operability
The HN-C3030 uses the newly designed tilt-head type sensor, which allows measurement from various directions. The laser scanner has a 98.6 mm working distance that enables scanning of highly uneven surfaces with depth. Moreover, it can measure heavy components weighing up 30 kg.
3. Wide range of application software (option)
Dedicated gear software is optionally available, enabling easy creation of teaching files and gear tooth analysis. It allows for specialized analysis of various gear types.
4. Usage outside temperature-controlled rooms (option)
The HN-C3030 can be used outside temperature-controlled rooms, such as at production sites, when connected to an optional thermal regulator that provides a constant interior temperature for the system.
Specification
Swipe horizontally to view full table.
| Max. part size | Φ300 x (H) 300 mm*1 | |
|---|---|---|
| Max. part weight for guaranteed accuracy | 30 kg (including fixture) | |
| Effective measurement range (X x Y x Z) | 300 x 300 x 300 mm | |
| Accuracy (based on JIS B7441(2009)) |
ES,MPE (sphere-spacing) | 5 µm |
| PFF,MPE (flat form) | 5 µm | |
| Laser scanner | Working distance | 98.6 mm (from center of measurement range) |
| Measurement distance | 20 mm | |
| Height detection range | ±10 mm | |
| Linear resolution | 20 µm | |
| Host computer | OS | Windows7® 64 bit*2 |
| Interface | USB2.0 x 1, IEEE1394b x 1 | |
| Dimensions (W x D x H) | 1,450 x 1,550 x 1,980 mm | |
| Weight | 1,170 kg | |
- *1Space for shaft (Φ61 x H187 mm extended downward from chuck fixture level) for measurement of shaft-mounted gears
- *2Windows® is a registered trademarks or trademarks of Microsoft Corporation in the USA or other countries.
The information is current as of the date of publication. It is subject to change without notice.
