Precision Measurement
By being able to perform precise measurements, it is possible to achieve high-precision parts processing and various types of control in equipment. Additionally, in the production process, it plays an important role in assembly adjustment and quality assurance and is the cornerstone of Nikon’s high-quality products. Nikon mainly specializes in measurements using light. Light is used as a measurement tool by spatiotemporally modulating the amplitude, phase, wavelength (frequency), and polarization, which are the characteristics of waves. We apply measurement methods that meet each request, such as measurement of transparent objects like optical components and high-speed measurement required for real-time control.
Wavefront Aberration Measurement
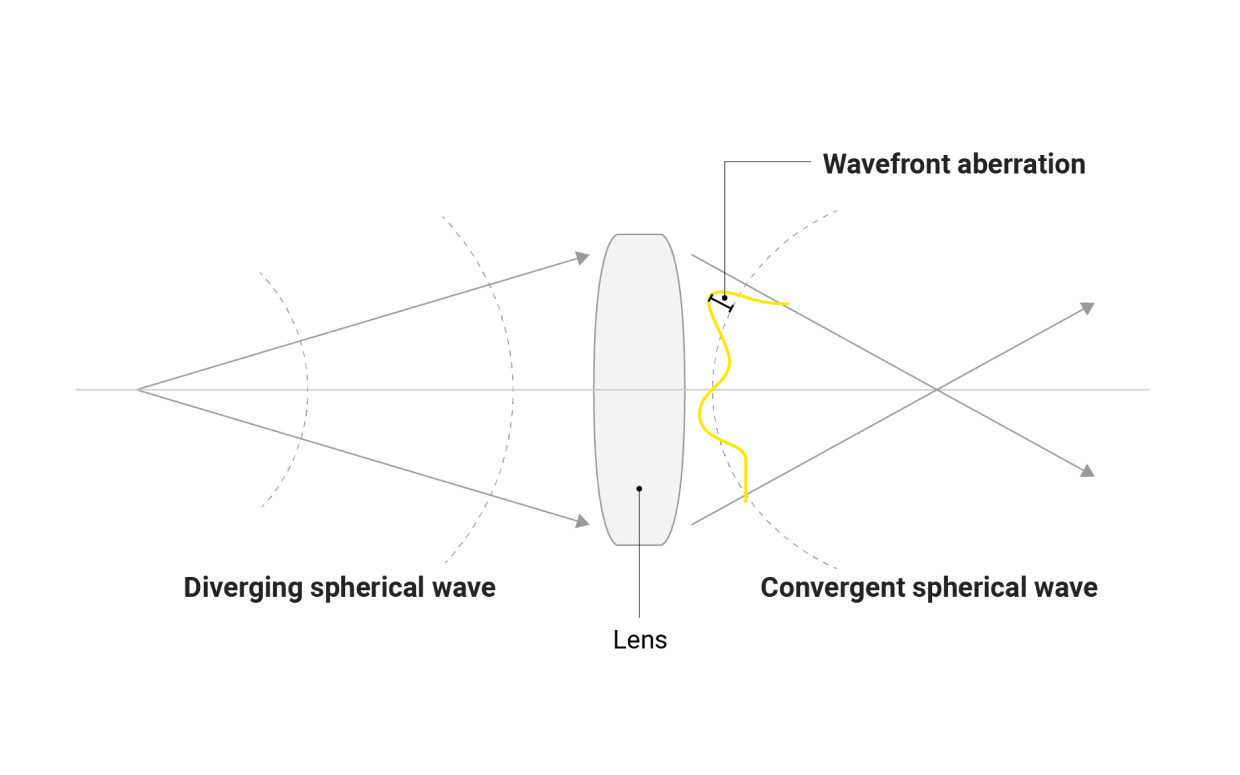
This method measures the deviation (wavefront aberration) from an ideal spherical wave where light converges to a single point. Wavefront aberration can evaluate multiple types of aberration components at once, and is used when adjusting optical systems and ensuring optical performance. Nikon has measurement methods suitable for a variety of optical systems. Projection lenses for lithography systems require high-precision measurement, camera interchangeable lenses require measurement for different focal lengths, such as wide-angle and telephoto, and microscope objective lenses require measurement across a wide wavelength band.

High Precision Position Measurement
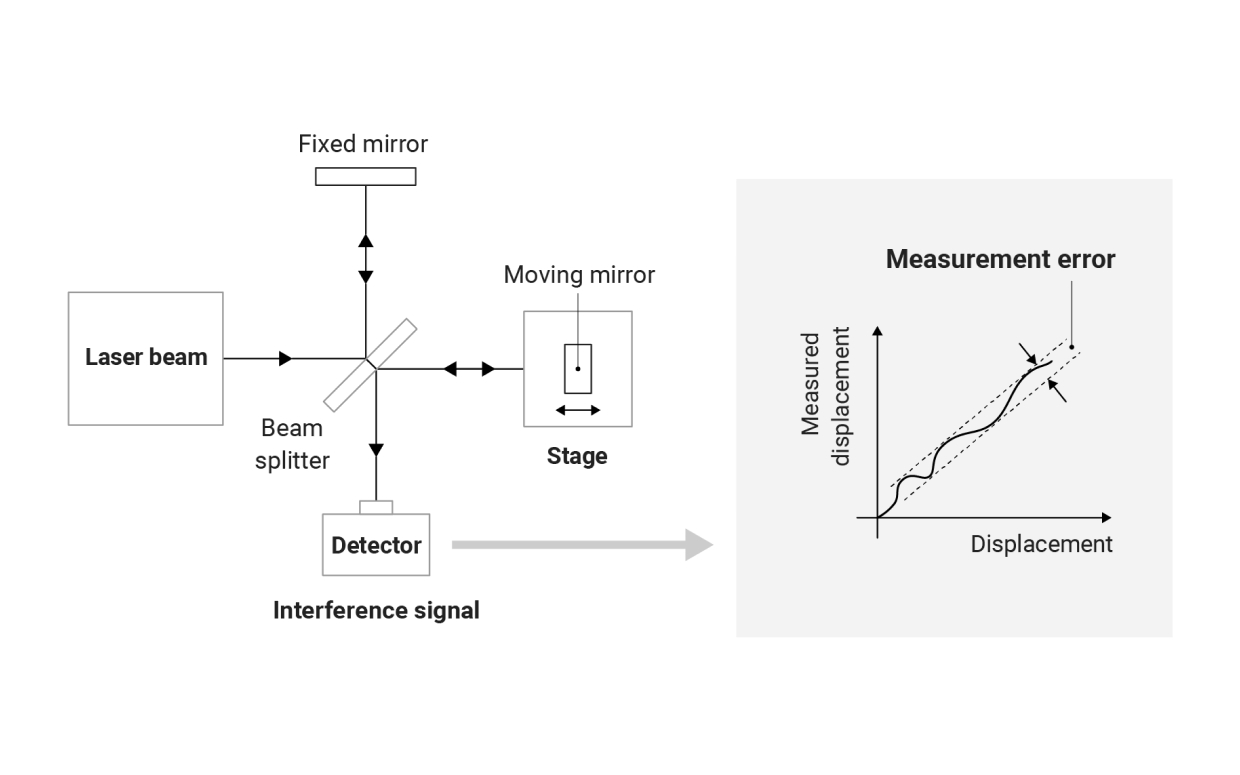
By measuring the position of the target of interest, it is possible to instruct the amount of drive to move the target to the desired position,or to align other targets with the target. At Nikon, we measure position using light, such as through optical interferometry, optical radar, and linear encoder methods. Lithography systems are used to expose the wafer at the precise on-stage position and requires high-speed, high-precision measurement.

Optical Component Shape Measurement
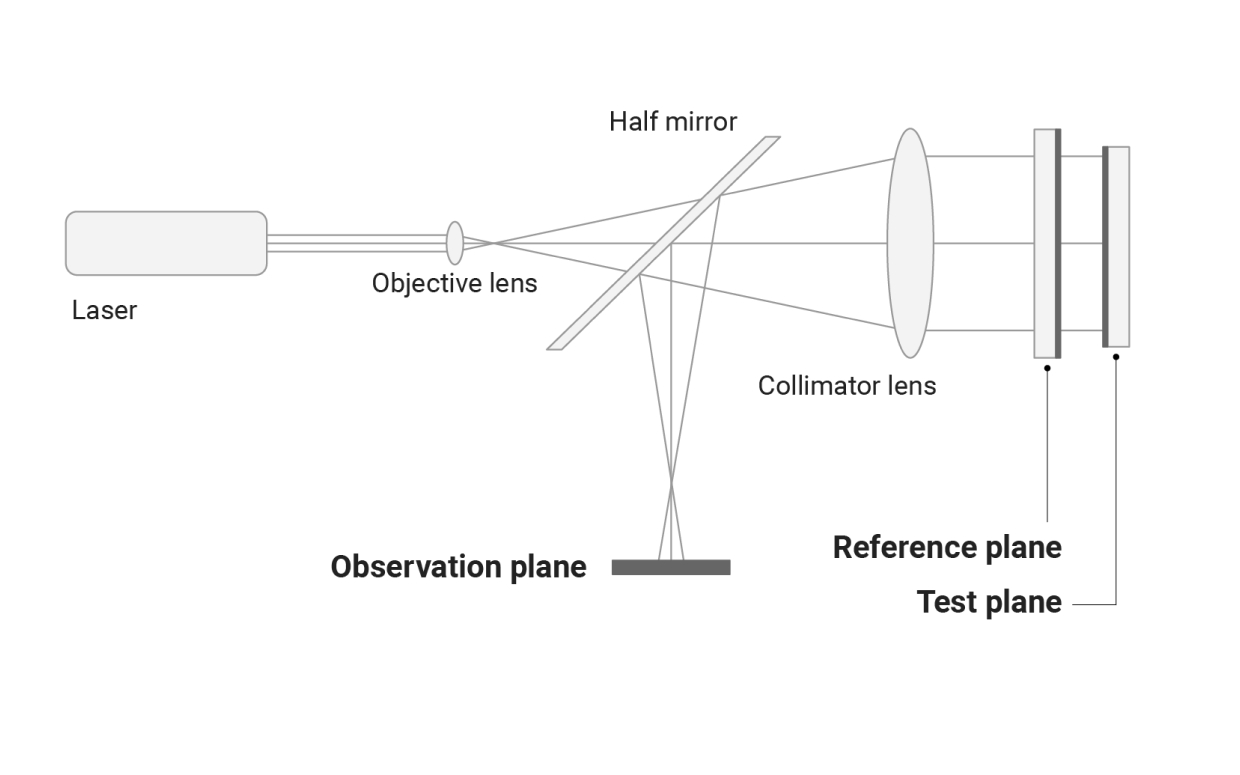
Optical components, such as lenses and mirrors that make up optical systems can change the reflection and refraction of light depending on their surface shape. By measuring the surface shape, it is possible to achieve the desired surface shape and manipulate light freely. In the production process of optical parts, this information is used for feedback on processing and quality assurance. Nikon handles a variety of optical components and applies measurement methods depending on their shape, size, and required accuracy.

Spectral Imaging
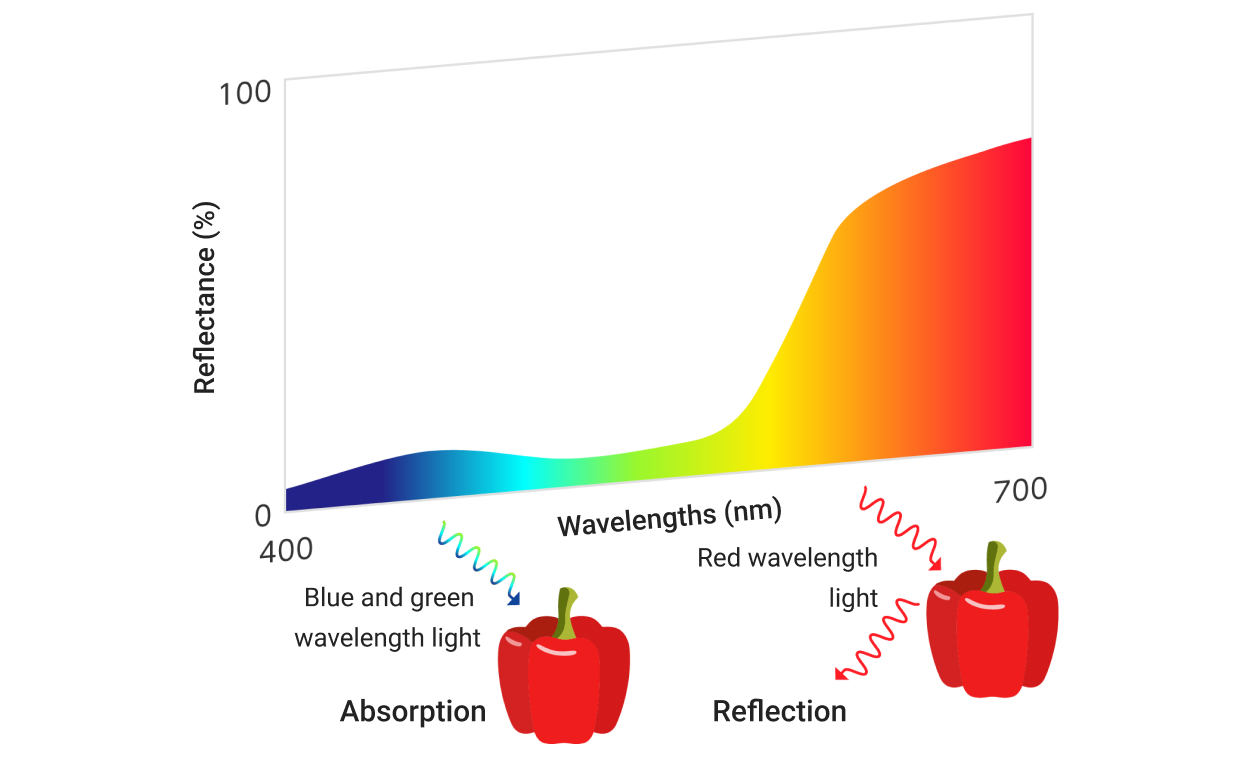
Materials vary in their degree of transmission and reflection depending on the wavelength of light, allowing the identification of substances using this property. Spectral imaging enables the understanding of the spatial distribution of materials. It is commonly used with ultraviolet, visible, and near-infrared wavelengths to identify organic substances. For example, it is used in detecting abnormalities in biological tissues and for quality control in food products.

You can search for articles related to Nikon’s technology, research and development by tag.
