Nikon introduces the large-volume non-contact measuring system “APDIS” series
Revolutionizing the efficiency of inspection processes in automobile production plants
October 27, 2020

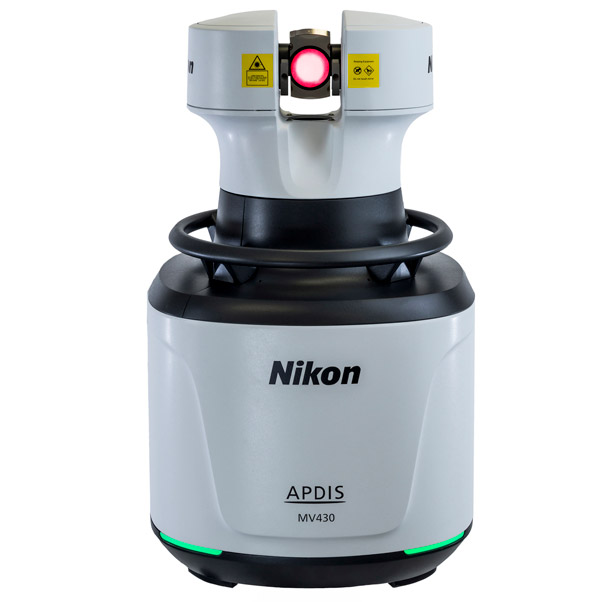
TOKYO – Nikon Corporation (Nikon) will release 4 products “APDIS MV430”, “APDIS MV450”, “APDIS MV430E” and “APDIS MV450E” of the large volume non-contact measuring system ”APDIS (Accurate Precision Distance Scanning)“ series which measures the three-dimensional coordinates of an object in a non-contact manner on a large scale.
The “APDIS” series is a Laser Radar based scanner that can acquire the three-dimensional coordinates of surfaces and features on large objects like car doors with an accuracy of tens of micrometers.
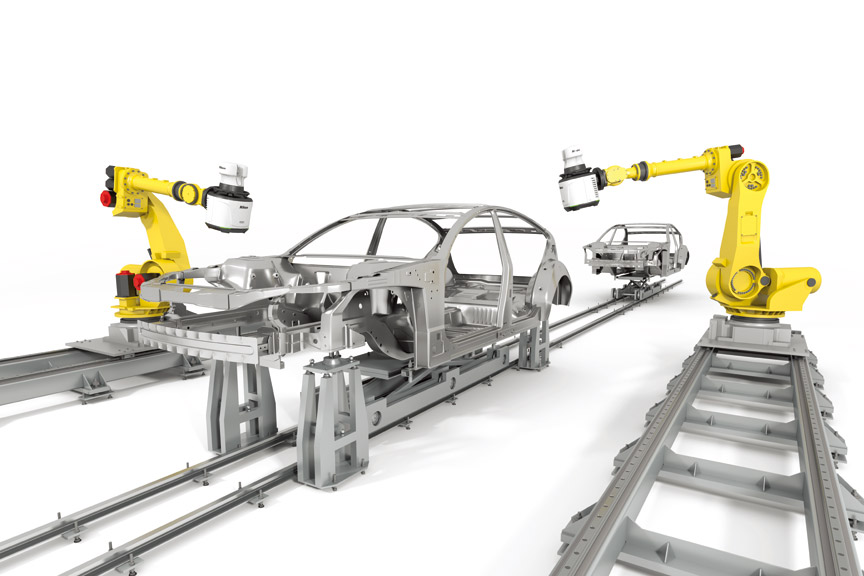
Other non-contact systems require surface preparation, reference stickers or laser probes to take measurements. The “APDIS” systems use a unique application of laser-based measurement allowing them to directly measure surfaces and features without the need for adapters, stickers or surface coating, all from a safe stand-off. Furthermore, due to its portability, it can be deployed and installed in various places including production lines, robot arms and large machine tools contributing to improved productivity in automobile and other manufacturing plants.
Product Information
Swipe horizontally to view full table.
| Product Name |
Large-volume non-contact measuring system “APDIS MV430” “APDIS MV450” “APDIS MV430E” “APDIS MV450E” |
|---|---|
| Availability | October 27, 2020 |
In automobile production factories, component inspections that require high-precision measurement typically cannot be performed on the production line, and it is common to bring them to a special inspection room for inspection. This has led to a paradigm shift in the automotive industry, which is requiring inspection methods that save the trouble of bringing components to the inspection room. The “APDIS” series, is driving this paradigm shift by providing a compact and portable measuring system that can perform high-precision, absolute inspection on the production line removing the need to bring the component to the inspection room.

Key Features
1. Highly accurate measurement is possible
With Nikon's unique laser utilization technology, it is possible to acquire three-dimensional coordinates with an accuracy of several tens of micrometers without using a reflector, surface preparation or probes. All systems can measure from 0.5 m, the “APDIS MV430” and “APDIS MV430E” can measure up to 30 m, and the “APDIS MV450” and “APDIS MV450E” can measure up to 50 m.
2. Compact and lightweight
To aid with portability and robot installations, the size (height) is reduced by approximately 25% and the mass is reduced by approximately 40% compared to the previous “Laser Radar” product. This greatly expands the range of installation locations and applications. In addition, the startup time has been significantly reduced, which makes the measurement setup even faster.
3. Excellent environmental resistance
APDIS has been designed for shop floor use with proven water and dust protection (IEC protection class IP54), so it can be used even in challenging environments. In addition, it can be installed on a robot arm and used in any orientation withstanding the associated accelerations.
4. Introducing new high-speed measurement model
The high-speed measurement models “APDIS MV430E” and “APDIS MV450E” can measure at up to twice the speed of the standard “APDIS MV430” and “APDIS MV450” models, greatly improving the inspection efficiency and throughput of metrology applications. “APDIS MV430E” and “APDIS MV450E” introduce the ability to perform direct, non-contact vibration measurement.
Main Specifications
Swipe horizontally to view full table.
| MV430 | MV450 | MV430E | MV450E | |
|---|---|---|---|---|
| Range | 0.5 m to 30 m | 0.5 m to 50 m | 0.5 m to 30 m | 0.5 m to 50 m |
| Scanning Speed | 500 pts/sec | 1,000 pts/sec | ||
| Vibration Measurement | n/a | 2,000 Hz Max; 1µm/m resolution | ||
| Environmental | IP54 | |||
Swipe horizontally to view full table.
| Operational | Storage | |
|---|---|---|
| Temperature | 5℃ to 40℃ | -20℃ to 60℃ |
| Humidity | 10% - 90% (non-condensing) | |
Swipe horizontally to view full table.
| Measurement Laser (Infrared) | Pointing Laser (red) | |
|---|---|---|
| Wavelength | 1,550 nm | 645-665 nm |
| Power | < 10 mW | < 1.0 mW |
| IEC Class | Class 1 | Class 2 |
Swipe horizontally to view full table.
| Range | Azimuth | Elevation | |
|---|---|---|---|
| Working Limit | 0.5 m - 30 m / 50m | ± 180° | ± 45° |
| Accuracy (MPE)* | 20 µm + 5 µm / m | 13.6 µm / m | |
- *Accuracy given as Maximum Permissible Error (MPE) in accordance with ASME B89.4.19 – 2006 verified in vertical orientation at 20 ° C.
Swipe horizontally to view full table.
| Accuracy for each range | Range (m) | 0.5 | 1 | 2 | 5 | 10 | 20 | 30 |
|---|---|---|---|---|---|---|---|---|
| MPE (µm) | 33 | 40 | 57 | 115 | 216 | 420 | 625 |
The information is current as of the date of publication. It is subject to change without notice.
